
Emulator
The RC759 PICCOLINE emulator is work in progress. The development of the emulator started at June 28th, 2012, and the first testing release was made at July 9th, 2012.
The impressive programming work is carried out by Hampa Hug, author of the PCE PC Emulator.
NEW: Web-based RC759 Emulator
Marcio Luis Teixeira has ported the PCE PC Emulator to JavaScript which allows anyone to run the emulator directly in a modern browser without the need to download or install anything. This is the easiest way to try out the RC759 Emulatur. You can try it out yourself by clicking the link below.
Web-based RC759 Emulator at RetroWeb
Getting started (Unix/Linux/Mac guide)
- First, make sure that you have libsdl installed.
- On Ubuntu, it is done with the command apt-get install libsdl1.2-dev.
- On Mac OS X, we recommed installing the Homebrew Package Manager and installing SDL with the command brew install sdl.
- Download the current version of the emulator by Hampa Hug at: http://www.hampa.ch/pce/download.html (download the file called pce-0.2.2.tar.gz or newer)
- Unpack the archive to a directory you decide, and compile it by ./configure --with-sdl ; make.
- For convenience, save the path of PCE to a temporary variable, PCE_PATH=`pwd`
- Set the keyboard layout of your OS to US English. This step is crucial, but does not work properly on Ubuntu 12.04 Unity, but works on Mac OS X!.
- After the compiliation, download a test environment from the same page (with a filename like pce-0.2.2-rc759-ccpm86-3.1.zip), and enter the directory, and run the emulator with $PCE_PATH/src/arch/rc759/pce-rc759 -v -c pce-rc759.cfg -l pce.log -g color -r.
- When the emulator has been started, you can switch keyboard layout back.
Mount disk images on-the-fly
Exit to the monitor (press escape, and then m). Write- -m emu.disk.insert 0:hello.img (mount image)
- -g (run emulation again)
We have experienced trouble when loading a sequence of images after each other. If the emulator does not seem to notice the image you just loaded, our best advice is to restart the emulator.
Screenshots
The screenshot are represented with the original aspect ratio preserved. Click on each image to view the screenshot with 1:1 pixel mapping.

Figure 1. Bootloader
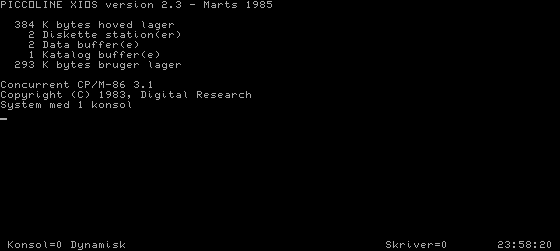
Figure 2. OS Boot
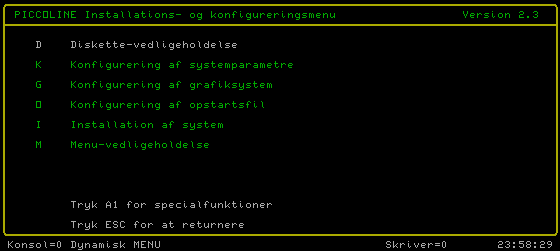
Figure 3. Installation and configuration menu
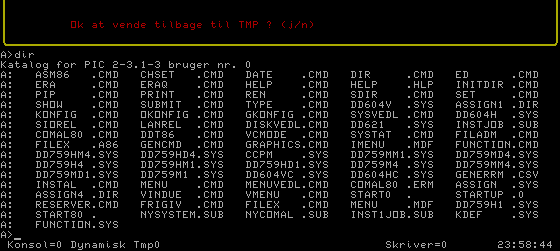
Figure 4. Directory listing
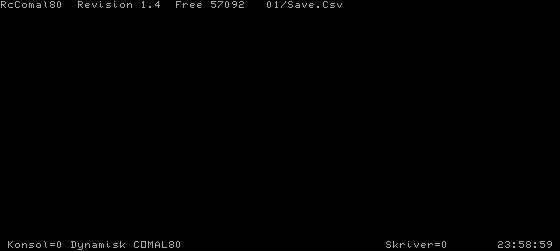
Figure 5. RcComal80
Conversion of disk images to the emulator format
PBIT files contain floppy disk images at a very low level, in this case the MFM encoded bits. Basically it is the magnetic flux changes sampled at 1 MBit/s. You can convert your own raw images to PBIT and back using pfdc and pbit, two utilities included with PCE. First you convert the raw image to PFDC (a PCE specific sector-level image file format):
$ pfdc -r 0-76 0-1 1-8 -p new -e size 1024 -e mfm-hd 1 -p load
image.img -o image.pfdc
This command is complicated because pfdc cannot (and will not) automatically detect the geometry of raw images. There is no way to know that the image geometry is supposed to be 77/2/8 with 1024 bytes sectors as opposed to 77/2/16 with 512 byte sectors. This is also the reason why the image must be converted to PFDC first.
Next you convert the PFDC to PBIT:
$ pbit -p encode mfm-hd-360 image.pfdc -o image.pbit
You now have a PBIT image that can be used with the emulator. To convert back to raw, you first convert back to PFDC:
$ pbit image.pbit -p decode mfm image2.pfdc
and then PFDC to RAW:
$ pfdc image2.pfdc image2.img
You can also create an empty PBIT file and then format it inside the emulator:
$ pbit -o fd1.pbit
When you format a disk like this, you will get a lot of "SELECT TRACK ERROR" error messages. These are harmless.
You can already switch floppy disks. To do this fall back to
the monitor (with
-m fdc.insert 0:newimage.pbit
where the "0:" is the drive number.
Type h in the monitor to get help, and type g to continue the emulation.