Reading and writing RC75x Floppy Disks with a Linux PC
Peter Haagerup, July 2012
RC75x Piccoline/Partner floppy disks can be read and written using a modern PC, using Linux and some freely available utilities. After reading this guide, you will be able to
- Understand the details of the RC75x floppy format
- Dump RC75x floppy disks to RAW floppy images with dd and ddresuce
- Write RAW RC75x floppy images back to 5.25" HD disks using the dd command
- How to transfer files to (and from) the RAW floppy images using cpmtools
You will need the following items:
- A 5.25" floppy disk drive
- A modern PC with a floppy controller that works with 5.25" floppy disk drives (check your motherboard and BIOS)
- Linux (other Unix-like operating systems might work as well) with the following utilities installed:
The RC75x floppy disk format
Both the RC750 Partner and the RC759 Piccoline use the same floppy format. This format is a little different than the regular IBM PC floppy formats. The obvious difference is that the RC75x floppy disks are CP/M disks whereas the IBM PC disks are DOS formatted. Apart from that, the number of tracks, sectors etc. are also different.
 |
 |
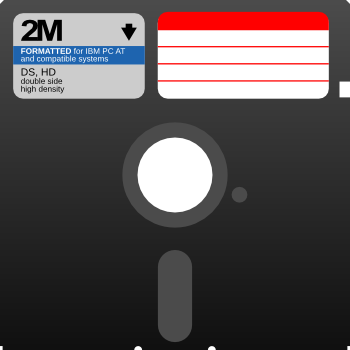
| Figure 1: A 5.25" floppy disk | Figure 2: Inside the floppy (simplified) |
Figure 1 shows a regular 5.25" floppy disk. Figure 2 shows a simplified view of the magnetic disc inside. A track (orange), also named cylinder, and a sector (blue) is highlighted. Also visible are the spindle hole (center) and the index hole.
Both the RC750 PARTNER and the RC759 PICCOLINE uses DSHD 96TPI (Double Sided, High Density, 96 tracks per. inch) 1.2MB 5.25" floppy disks formatted with 77 tracks, 8 sectors per track and a sector length of 1024 bytes.
Setting up your floppy disk drive to read RC75x formatted floppy disks
Since the RC75x formatted floppy disks are not directly IBM PC compatible, a special command is needed in order to make the floppy disk drive read these disks. Assuming that the floppy disk drive is the first drive (drive A), the device file for this drive is usually /dev/fd0. If you have more than one floppy disk drive or have chosen to set the drive 5.25" as drive B, use /dev/fd1 instead. Assuming that you have installed fdutils, type the following command after the floppy disk has been firmly and correctly inserted.
# setfdprm /dev/fd0 sect=8 hd ssize=1024 cyl=77
The arguments hd, sect=8, ssize=1024 and cyl=77 sets the floppy drive to use high density MFM-encoded floppy disks with 77 tracks – each track consisting of 8 sectors, each 1024 bytes long.
It cannot be stressed enough that this command has to be executed for each floppy, after it has been inserted. Furthermore, you may need to be root to execute the command.
Dumping RC75x floppy disks to raw floppy images
The RC75x floppy disks can be read in different ways and dumped to different kind of images for further processing. This guide tells you how to get dd and cpmtools compatible images like the ones that are available for download in the software section of this website.
Both dd and ddrescue can create these images. We strongly encourages you to use ddrescue instead of dd. Why? Because ddresuce will try a lot harder to rescue the data from error-containing disks. With ddrescue, minor errors are usually rescued giving a 100% error free floppy disk image. dd, on the other hand, gives up way too early and will give you an empty output file even if some data was actually read. Even the worst garbage-like floppy disks can usually be partially rescued with ddrescue. Besides, ddrescue saves a log file, which is important – especially with error-containing disks.
After the floppy is inserted firmly into the floppy disk drive, use the earlier mentioned setfdprm command (you might need to be root to do this):
# setfdprm /dev/fd0 sect=8 hd ssize=1024 cyl=77
Dumping to floppy image using ddrescue (recommended)
Suppose we want to dump the floppy image to the file test.img, ddrescue is called like this:# ddrescue -v -d -b 1024 -c 8 /dev/fd0 test.img test.log
This step might take some time if the floppy contains errors. It is a very good idea to save the log file along with the image, especially if the floppy contained errors.
Dumping to floppy image using dd (NOT recommended)
If you for various reasons cannot install ddrescue, you can use the regular dd command instead, though this is not recommended as explained above):
# dd if=/dev/fd0 of=test.img
Special care has to be taken: If you accidently exchanges if and of, you are actually writing the image test.img to the floppy disk instead of rescuing it! This is one more reason why dd is not recommended for reading/rescuing floppy disks (or hard drives for that matter) and might be the reason why dd is sometimes jokingly referred to as "disk destroyer" or "death and destruction".
You can now transfer files to (or from) the floppy image using cpmcp from the cpmtools package. This is explained in another guide (coming soon).
Writing RC75x compatible images back to floppy disk
This time, we use dd since ddrescue is a read-only tool (only execute the following command on a new or a rescued floppy to prevent data loss):
# dd if=test.img of=/dev/fd0
Observe that the command is identical to the previously mentioned dd-command with the exception that if and of are exchanged.
If the dd-command mentioned above does not work and returns with errors fairly quickly in the process, you might have to format the disk. This can be done with the fdformat command:
# fdformat /dev/fd0
Then try to write to the floppy again with dd. Remember that the fdformat command only does low-level formatting – no filesystem is created. Also remember to set the correct floppy parameters with the setfdprm command, else the floppy will be low-level formatted as a DOS compatible floppy.